
How Far Will My ERA-DSTX Driveway Sensor Really Reach?
A PIR sensor doesn’t measure distance — it measures contrast. It sees a target only when that target is meaningfully warmer or cooler than whatever sits directly behind it, and only when the target moves across the lens’s detection pattern rather than straight at it. Change the background temperature, the approach angle, the battery voltage, or the amount of film on the lens, and the same sensor in the same spot will “lose” ten feet of range with nothing visibly different.
On This Page
- How the Sensor Actually “Sees”
- Is the “Two Fingers to Trigger” Explanation Correct?
- Why the Rated Range Is Not Your Range
- What the Four Settings Actually Do
- Range — Low (25 ft) / Medium (50 ft) / High (100 ft)
- Filter — On / Off
- Reset — Short / Long
- LED — On / Off
- Optimal Conditions for Maximum Detection Range
- Placement and Aim
- Thermal Environment
- Hardware Condition
- The Recipe for a Walking Person at 25–30 Feet
- When Range Drops Off Over Time
- Why Vehicles Are Harder Than People
- How to Test Properly
- ERA-DSTX Specifications at a Glance:
- Related Articles
- Still Not Getting the Range You Need?
Applies to the ERA-DSTX driveway sensor/transmitter and every kit built around it — the ERA-DSDCR (sensor plus desktop ERA-DCRX receiver) and the ERA-DSRXPG (sensor plus plug-in ERA-RXPG receiver).
How the Sensor Actually “Sees”
Two parts inside the ERA-DSTX matter.
The pyroelectric element. This is a dual-element detector: two infrared-sensitive segments wired in opposition. If both segments warm by the same amount at the same time — which is what happens when the sun comes out or the air temperature rises — their signals cancel and the sensor stays quiet. That opposition is deliberate; it’s what keeps the unit from alarming every time a cloud moves. The corollary is that the element is blind to uniform heat. It only reacts when one segment sees something the other doesn’t.
The Fresnel lens. The white plastic window is not a simple lens. It’s a molded array of small lens facets, and each facet aims a narrow cone of the sensor’s field of view at one of the two elements. The result is that the coverage area is chopped into a fan of alternating narrow beams, widely referred to in the trade as “fingers” (also called zones, lobes, or curtains). Between each finger is a gap the sensor is effectively blind to.
Detection is a zone crossing. When a warm body crosses from a finger into a gap, or from a finger aimed at element A into one aimed at element B, the balance between the two elements breaks and the amplifier produces a voltage swing. That swing is what the electronics call a pulse. One body crossing several fingers produces a train of pulses.
Three consequences follow directly, and they explain most real-world complaints:
- Crossing beats approaching. A person walking across the pattern cuts through finger after finger and generates a strong pulse train. The same person walking directly at the sensor stays inside a single finger almost the whole way and generates very little signal until they’re close. This alone can cut apparent range by half or more. It’s why the manual tells you to mount the sensor roughly 20 feet to the side of the drive rather than at the end of it looking down its length.
- The fingers spread as they go. Near the sensor the fingers are narrow and tightly packed. At 60 or 100 feet they are wide and far apart, with wide blind gaps between them. At long distance a target can travel a considerable way inside one finger without ever crossing into the next — so it never generates a second pulse.
- Contrast is the fuel. The size of each pulse depends on the temperature difference between the target and the background behind it, not on the target’s absolute temperature. No contrast, no pulse, regardless of the range setting.
Is the “Two Fingers to Trigger” Explanation Correct?
Essentially yes, with one refinement. The Filter setting on this class of PIR board is a pulse-count filter. With the filter on, the electronics require two qualifying pulses inside a short timing window before they declare motion. With the filter off, a single pulse is enough. In practice two pulses means the target crossed multiple fingers, so “two fingers have to see the change” is a fair working description of what’s happening.
The refinement is that the circuit counts signal events within a time window, not fingers as such. A target can generate two pulses by entering and leaving a single finger, and if the second pulse doesn’t arrive before the window closes, the counter resets to zero and the sensor stays silent. That’s the part that matters to you: the filter doesn’t just make the sensor “less sensitive,” it makes the sensor require more motion, delivered faster, than a single pulse would. That is exactly why turning the filter on tends to shorten usable range and drop fast-moving vehicles, and why turning it off restores both.
Why the Rated Range Is Not Your Range
The ERA-DSTX is rated to detect people and vehicles at up to approximately 100 feet on the high setting. That number describes what the sensor can do under favorable conditions: a target crossing the pattern broadside, with good thermal contrast, a fresh battery, and a clean lens.
It is not a promise that everything within 100 feet will be detected every time. Nothing about PIR works that way. Treat the rated range as a ceiling and expect reliable, repeatable detection at roughly half to two-thirds of the setting you’ve selected.
That’s the single most useful takeaway for anyone trying to get consistent detection at 25–30 feet: do not run the Range setting on Low (25 ft). That asks for 100% of the rating. Run Medium.
What the Four Settings Actually Do
Open the case (four Phillips screws on the back) to reach the circuit board. Remove the battery before changing anything. On current production the settings are jumpers — small black plastic shunts that slide over pairs of pins. Some units and older revisions use DIP switches instead; the labels and the behavior are the same either way.
Range — Low (25 ft) / Medium (50 ft) / High (100 ft)
This does not physically shorten or lengthen the beam. The lens pattern is fixed. What the Range setting changes is the amplifier gain and trigger threshold — how large a pulse has to be before the board counts it. Distant targets produce weak pulses, so a low threshold rejects them and the effective detection zone shrinks.
Practical effect: if the sensor sits 35–40 feet from the driveway but the Range is set to Low, it will not see passing traffic. It isn’t broken — you’ve told it to ignore anything that faint.
For a walking person at 25–30 feet, use Medium. Go to High only if Medium still misses, and be aware that High will also pick up things well beyond your driveway, which is why the manual specifically warns against aiming the sensor at a distant road.
Filter — On / Off
Manufacturer guidance is On for outdoor use, Off for indoor use. As described above, On requires two pulses in a time window; Off triggers on one.
- Filter On — fewer nuisance alerts from wind-moved branches, blowing warm air, birds, and sun flicker. Shorter effective range. Higher chance of missing a fast vehicle.
- Filter Off — maximum sensitivity and maximum range. More false alerts.
This is a genuine trade-off with no universally right answer. Start with it On. If you’re missing detections you care about more than you mind the occasional false alert, turn it Off. A large share of customers who need vehicle detection end up on Filter Off.
Reset — Short / Long
Sets the minimum time between alarms — a lockout window after each trigger during which the sensor deliberately ignores everything. Typically a short option of around 10 seconds and a long option of around 2 minutes; read the labels next to the pins on your board.
This setting causes more phantom “my range shrank” reports than any other. If you’re on the long setting and you walk the driveway three times in a row to test, only the first pass will alert. The next two land inside the lockout window, and the unit will look dead or erratic. Put Reset on the short setting while you test.
Choose the long setting afterward only if you have heavy back-to-back traffic and the alerts are becoming noise — and accept that a second vehicle arriving inside the window will not be announced.
LED — On / Off
Turns on the indicator that lights when the sensor transmits. Turn it On during setup, because it separates the two failure modes. LED lights but no chime means the sensor detected fine and the radio link is the problem. No LED at all means the sensor never detected, which is a sensitivity or placement problem.
Optimal Conditions for Maximum Detection Range
These are the conditions that let the sensor perform at its best. The further you drift from them, the more range you lose.
Placement and Aim
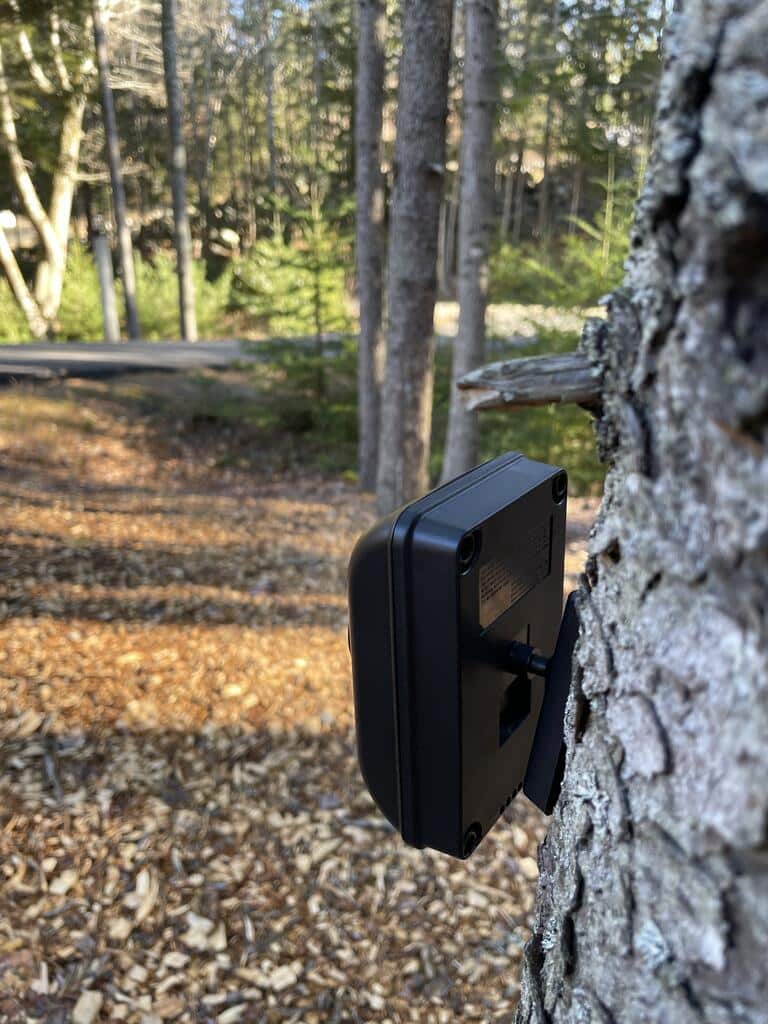
- Mount 3–4 feet off the ground. That puts the fan of fingers at torso height on an adult across the whole detection distance. Mounting high and angling down is a security-camera habit and it shortens range badly — the beams hit the ground well before they reach their potential distance.
- Keep the lens level. Not tilted down toward tires, not tilted up over the roofline of a car. A couple of degrees of tilt at 30 feet moves the entire pattern into the dirt.
- Mount roughly 20 feet to the side of the driveway or path, so traffic crosses the pattern broadside instead of walking or driving straight into it.
- Ensure the arrow on the bracket faces up and the LED sits toward the top of the case. Mounted upside-down, the sensor still powers on but the lens pattern is inverted and coverage is wrong.
- Mount on wood or plastic — a wooden post, fence, or tree. Avoid metal siding and metal posts, which detune the 433 MHz transmitter and cut wireless range.
- Make it rigid. Anything that lets the housing sway in wind produces false triggers, because a moving sensor sweeps its own fingers across a stationary background.
Thermal Environment
- Aim away from the sun’s path. Never point the lens where direct low sun (east at sunrise, west at sunset, and low winter sun generally) shines into it. Direct sun both false-triggers and temporarily desensitizes the element. North-facing is ideal in the northern hemisphere, and a small hood or shade over the lens helps.
- Keep hot backgrounds out of the field. Sun-baked asphalt, dark gravel, brick, and metal can reach 130–150°F on a summer afternoon. A person standing in front of that background has negative contrast and may be nearly invisible. Grass, shade, and shrubs make far better backgrounds than bare pavement.
- Avoid A/C condensers, dryer and furnace vents, exhaust, pool heaters, and open water anywhere in the field of view.
- Expect real seasonal variation. Detection range is longest on cold days and shortest on hot ones. This is physics, not a defect. A person’s radiating surface sits at roughly 80–90°F through clothing, so against a 50°F background the contrast is large and the range is long, while against a 90–95°F background the contrast nearly vanishes and range can drop by half. Heavy winter coats work the other way and reduce contrast, because the coat’s outer surface sits close to ambient.
Hardware Condition
- Use a fresh, quality 9V alkaline battery. Not carbon-zinc, and not a rechargeable 8.4V NiMH — both sit at a lower voltage and rob the amplifier of the headroom it needs. A 9V lithium is an excellent choice in cold climates. A tired battery is the single most common cause of “it used to reach farther”: the unit still powers on, still blinks, still transmits, but the front-end gain drops and marginal distant targets stop qualifying. When range degrades over time, change the battery first.
- Keep the lens clean. The Fresnel lens is polyethylene, and dust, pollen, road film, water beading, spiderwebs, and insect nests inside the housing all scatter incoming infrared. Wipe with a soft damp cloth only. Do not use alcohol, glass cleaner, or any solvent — they haze the plastic permanently, and that range loss never comes back.
- Let it settle. After installing the battery, give the sensor 30–60 seconds to thermally stabilize before you trust a test.
The Recipe for a Walking Person at 25–30 Feet
- Range: Medium (50 ft) — gives you headroom over the target distance
- Filter: Off — one pulse, maximum sensitivity; revert to On later if false alerts become a nuisance
- Reset: short setting — so consecutive test passes actually register
- LED: On during setup
- Height: 3–4 ft, lens level
- Geometry: sensor offset to the side so the person walks across the field, not toward it
- Battery: brand-new alkaline
- Background: grass or shrubs behind the walking path, not sun-baked pavement
- Timing: test in the morning or evening, not on a 95°F afternoon
When Range Drops Off Over Time
When conditions genuinely look identical and range still falls, it’s almost always one of the following. The list is ordered by how often each turns out to be the culprit — work it top to bottom. For the full field walkthrough of this exact scenario, see My ERA-DSTX detection range dropped from 25 feet to 15.
- Battery voltage sag. Overwhelmingly the most common cause. Fit a brand-new alkaline and re-test before investigating anything else.
- The Reset lockout. If you’re on the long setting, repeated test walks land inside the ignore window and look like a shrinking detection zone. Switch to the short setting and re-test.
- Background temperature, not air temperature. “Same temperature” usually means the same reading on a thermometer. What the sensor cares about is the temperature of the surfaces behind the target — and pavement, gravel, and walls run far hotter than the air on a sunny day and far colder on a clear night. Same air temperature, completely different contrast.
- Approach angle. A small change in the walking path — a few degrees more head-on — cuts across dramatically fewer fingers. This is a very easy variable to change without noticing.
- Clothing. A jacket radiates near ambient; a T-shirt radiates near skin temperature. Same person, same spot, very different signal.
- Lens film or an occupant. Check for pollen haze, a water film, a spiderweb across the window, or a wasp or spider that has set up inside the housing.
- Aim drift. Check that the swivel hasn’t loosened, the post hasn’t settled, and the bracket hasn’t rotated. Confirm the lens is still level.
- A new heat source in the field. A vehicle parked where it wasn’t before, a new light fixture, a relocated A/C unit, or foliage cut back to expose sunlit pavement can all raise the background and eat your contrast.
- RF, not PIR. Turn the LED on. If it flashes and the receiver stays quiet, detection is fine and you have a wireless range or interference problem — move the receiver, move the transmitter off any metal, or add a second receiver.
Why Vehicles Are Harder Than People
It’s counterintuitive, but a car can be harder to detect than a person.
- Painted sheet metal is a poor infrared radiator and, on a car that’s been sitting, sits at ambient temperature. The sensor mostly sees the grille, engine bay, exhaust, tires, and glass — a much smaller effective target than the car’s silhouette suggests.
- A cold car is much harder than a warm one. A vehicle that has just been driven throws a large signature; one that has sat overnight throws very little.
- Speed cuts both ways. A vehicle crosses the fingers fast, which produces sharp pulses, but it may be inside the field for well under a second. With the Filter on, if the second pulse doesn’t land before the timing window closes, there’s no alarm. This is precisely why customers chasing vehicle detection so often land on Filter Off with Range Medium.
- Aim at the body, not the tires. Keep the lens level at 3–4 feet, where it looks at the warm hood, grille, and engine bay rather than down at cold rubber.
If vehicles are your priority, see also our dedicated article on the ERA-DSTX not picking up cars.
How to Test Properly
- Set Reset to the short setting and turn the LED on.
- Install a fresh alkaline battery and wait a full minute.
- Walk a crossing path at your target distance — perpendicular to the sensor, not toward it — at a normal walking pace. Don’t creep; very slow movement produces pulses too gradual for the amplifier to see.
- Wait at least 15 seconds between passes so the lockout clears.
- Work outward: confirm detection at 10 ft, then 20, then 30, and find the honest edge.
- If the LED fires but the receiver doesn’t chime, that’s a wireless problem, not a detection problem.
- Repeat once in the cool of the morning and once on a hot afternoon so you know your real seasonal envelope.
ERA-DSTX Specifications at a Glance:
- Sensor type: Passive infrared (PIR), outdoor rated
- Power: One 9V alkaline battery (not included)
- Detection range: Low: to 25 ft · Medium: to 50 ft · High: to 100 ft
- Wireless range: Up to 4,000 ft, line of sight
- Operating frequency; 433 MHz
- Operating temperature: −30°F to 120°F (−34.4°C to 48.9°C)
- Dimensions (H×W×D)4.5 × 3 × 2.25 in:
- Adjustable settings: Range, Filter, Reset, LED
- Compatible receivers: ERA-DCRX, ERA-RXPG, ERA-VPRX
- Capacity: Up to 12 transmitters per receiver; unlimited receivers per transmitter
- Recommended mounting: 3–4 ft above ground, ~20 ft to the side of the drive or path
- Low-battery indication: Receiver zone LED flashes for 10 minutes when triggered; melody plays twice
Related Articles
- My ERA-DSTX detection range dropped from 25 feet to 15 — the step-by-step field diagnosis for a sensor that used to reach further.
- My ERA-DSTX outdoor driveway motion sensor is not picking up cars — the vehicle-specific version of this problem.
Still Not Getting the Range You Need?
If you’ve worked through the settings and conditions above and the sensor still won’t reach, a few structural options are worth considering.
- Move the sensor rather than turning it up. Relocating to the opposite side of the drive solves a surprising number of cases, usually because it changes the background behind the target or removes an obstruction from the transmission path.
- Use two sensors. There’s no penalty for it — an ERA receiver pairs with up to 12 transmitters, and assigning each a different melody tells you which one fired. Two sensors covering overlapping arcs will always beat one sensor turned up to maximum.
- Add a receiver. There’s no limit to how many receivers a single transmitter can drive, so you can cover the house, the shop, and the barn from one sensor.
And if you’re still stuck, get in touch. Tell us your mounting height, the distance from the sensor to the path, your Range and Filter positions, and whether the LED lights when you walk past. Those four answers narrow it down almost every time.
More in ERA Product FAQ
Browse the full FAQ category or continue with related answers from the same FAQ category.