
What Doorbell Wire Do You Need? Guide to Gauge, Voltage, Distance
The right doorbell wire depends on your system's voltage, current needs, and the distance from the transformer to the chime.
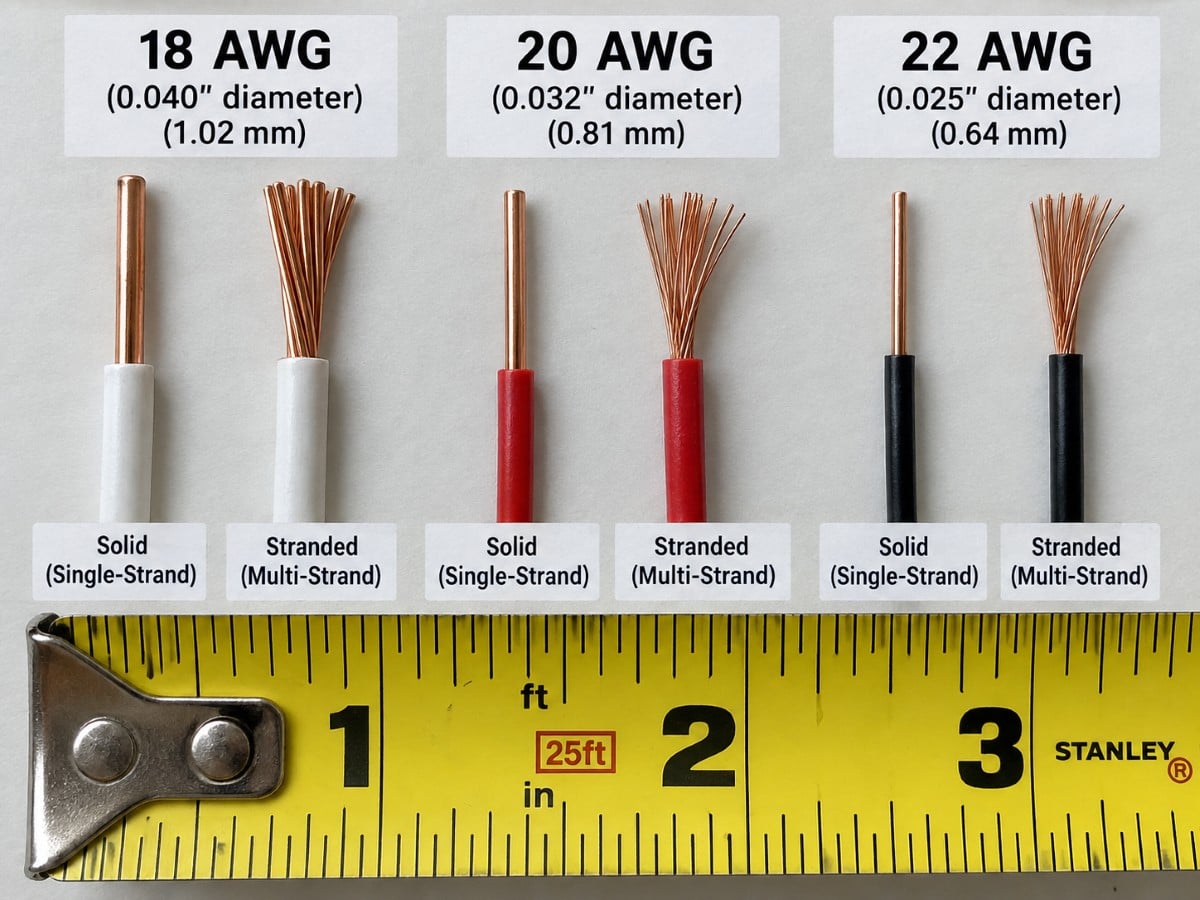
What Doorbell Wire Do I Need?
Most wired doorbells use low-voltage 18-gauge or 20-gauge copper wire, with the exact choice depending on your system's voltage, current needs, and the distance from the transformer to the chime. Selecting the correct wire ensures your doorbell operates reliably, providing consistent sound and preventing issues like a weak chime or a non-functioning button light.
Using the right wire is a crucial part of setting up or maintaining any wired doorbell system. It helps deliver consistent power from your doorbell transformer to your chime and button, avoiding problems that can arise from inadequate wiring.
Understanding Doorbell Wire Gauge (AWG)
Wire gauge refers to the thickness of the wire, measured by the American Wire Gauge (AWG) standard. In this system, a smaller gauge number indicates a thicker wire. For instance, 18-gauge wire is thicker than 20-gauge wire.
Thicker wires have less electrical resistance, which means they can carry more current and minimize voltage drop over distance. This is important for doorbell systems, as they rely on a consistent low voltage to function correctly.
Matching Wire to Your Doorbell System's Voltage
Wired doorbell systems typically operate on low voltages, such as 10V, 16V, or 24V, supplied by a doorbell transformer. You can usually find your system's required voltage printed on the transformer itself, the chime unit, or the doorbell button.
It's important to match your wire choice to this voltage. Systems with higher voltage often allow for thinner wire over longer distances, but always consult your doorbell's specifications. Using wire that is too thin for your system's voltage and current can lead to insufficient power reaching the chime or button, causing operational problems.
How Distance Affects Your Doorbell Wire Choice
The total length of the wire run from the transformer to the chime and then to the door bell buttons significantly impacts your wire choice. Electrical resistance increases with wire length, leading to a voltage drop. To compensate for this, longer wire runs require a thicker gauge wire (a smaller AWG number) to maintain adequate voltage.
As a general guideline for most low-voltage doorbell systems:
- For runs up to 50 feet: 20-gauge wire is often sufficient.
- For runs between 50 and 100 feet: 18-gauge wire is typically recommended.
- For runs over 100 feet: You may need to consult the doorbell manufacturer's specific recommendations or consider a higher voltage transformer in combination with 18-gauge wire.
If the wire is too thin for the distance, you might experience a weak or intermittent chime, or your lighted doorbell button may not illuminate.
Types of Doorbell Wire and Materials
The vast majority of doorbell wiring is made from copper due to its excellent electrical conductivity and durability. For permanent installations, solid copper wire is preferred as it is robust and holds its shape well when routed through walls and along joists.
The wire is usually insulated with a plastic jacket. It is often referred to as "bell wire." We offer 20-gauge two-lead bell wire bundles suitable for many standard doorbell installations. These low-voltage wires are designed for indoor use and are generally easy to work with.
Signs You Might Need New Doorbell Wire
Even if your doorbell has worked for years, aging or improperly chosen wire can cause issues. Here are some signs that your doorbell wire might need attention:
- Intermittent or Weak Chime: If your doorbell sometimes rings loudly, sometimes softly, or not at all, the wire might not be delivering consistent power.
- Lighted Button Not Working: Many modern doorbell buttons include a small light. If this light flickers or fails to illuminate, it could indicate insufficient voltage due to old or thin wire.
- No Chime Despite Other Components Working: If you've tested your transformer and chime unit and they appear functional, the wire connecting them might be the culprit.
- Visible Damage: Frayed, corroded, or visibly damaged wire can lead to poor performance and safety concerns.
- Doorbell Button Feels Hot: Overheating wire can be a sign of too much resistance, often due to an undersized wire for the load or distance.
Basic Tips for Installing Doorbell Wire
Installing doorbell wire is a task many homeowners can handle, but safety and proper technique are essential:
- Turn Off Power: Always begin by turning off the power to your doorbell system at the circuit breaker. Verify the power is off using a voltage tester before touching any wires.
- Plan Your Route: Map out the shortest and most direct path for your wire from the transformer to the chime and then to the button. Avoid running low-voltage wires parallel to high-voltage wires for long distances, as this can cause interference.
- Secure Connections: Ensure all wire connections are tight and secure at the transformer, chime, and doorbell button. Loose connections are a common cause of doorbell problems.
- Consider Future Needs: If you're undertaking a renovation, it might be a good time to run extra wire or slightly thicker gauge wire than strictly necessary. This provides flexibility for future upgrades, such as a video doorbell.
If you're unsure about any part of the wiring process, it's always best to consult with a qualified electrician. For more detailed instructions, you can refer to our step-by-step installation guide for wired doorbells, or browse our selection of doorbell transformers and wire.
More in Wired Doorbell FAQ
Browse the full FAQ category or continue with related answers from the same FAQ category.