
Product manual
FLDAPTR User Manual
Setup, pairing, and troubleshooting for the Security Flood Light Motion Sensor Light Adapter Kit.
- INSTRUCTION GUIDE Note: The 9-Volt battery supplies power to the
- sensor only, not the light itself.
- Motion-Activated Light Adapter -
- MOTION SENSOR INSTALLATION:
- Grey HS3100D/HS3100C
- 1. Turn off power at light switch.
- White HS3110D/HS3110C
- 2. Allow sufficient time for the bulb to cool. Then
- Congratulations on a wise purchase! remove bulb from the light socket.
- MotionDetector 3. Attach the Mounting Bracket to the wall or ceiling
- TOP
- using the screws provided. Make sure to mount
- the Motion Sensor within 3-4 inches of the light
- Cord
- fixture you want to alert you of motion (Alert
- Light).
- For easier mounting: Unplug Socket Adapter from
- Sensor head.
- 4. Screw the Socket Adapter into the empty light
- socket and then screw light
- BOTTOM
- Socket bulb into Socket Adapter. Bulb
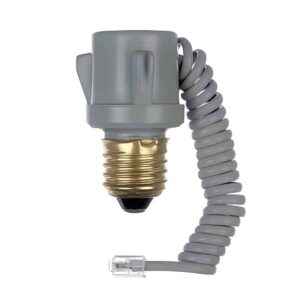
- Mounting Adapter
- Bracket Note: Maximum bulb watt-
- age is 150W per socket. If
What's Included
bulb interference is caused
- Motion Sensor by extension of the Socket
- Mounting Bracket (attached) Adapter, an “appliance” or Socket Adapter
- Socket Adapter with Cord “ceiling fan light” bulb should
- Screws be used. These are available from most retailer outlets. TOOLS NEEDED: 5. If the Socket Adapter was
- Flat head screwdriver unplugged in Step 3, plug the phone-type connector back BATTERY NEEDED (not included): into the jack at the bottom of Light
- 9-Volt alkaline battery the Sensor housing. Fixture 6. Aim Sensor in the direction of
Battery Installation
activity you wish to detect. The Sensor has a wide 1. Remove battery cover from the bottom of the sen- detection angle, so precise aiming is not critical. sor housing by pushing open the sliding battery Note: When aiming Sensor, avoid direct exposure door. to automobile headlights, which might be inter- 2.
Install one 9-Volt alkaline battery into the battery preted as sunlight and therefore prevent lights compartment. Be sure the battery (+) and (-) ter- from coming on. minals match (+) and (-) contacts on battery cap. 3. Replace battery cover.
GUIDE D’INSTALLATION