
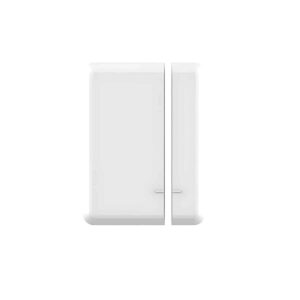
SS132 User Manual
Setup, pairing, and troubleshooting for the SS132 Wireless Magnetic Door Contact Alerts When Door Is Opened.
SS130 Wireless Doorbell User Manual Please read this user manual before using and installation
Overview
The SS series is expandable, allowing you to pair various transmitters to the receiver as well as adding additional receivers. These include:
- Doorbells
- Contact sensors
Kit Includes
- SS132 Magnetic Door Contact
- SS135 Plugin Doorbell Receiver
- Battery for SS132
- Double Sided
- This User Manual One doorbell receiver can be paired with up to 50 various transmitters. Each transmitter can be assigned a different ringtone.
What you should know before using
- The transmitter(s) is(are) paired with receiver(s) and set to the default ringtone "ding-dong" melody at the factory. IF they are not paired, please refer to the "Quick Start" to pair the transmitter(s) with receiver(s) and set your favorite ringtone.
- It is not advisable to mount the transmitter onto metal surfaces as this can block RF signals between the transmitter and the receiver. The included double-sided tape will help.
- Operating range will decrease if battery power in the transmitter is low.
- It is advisable to mount the transmitter under some shelter to reduce the aging of the plastic materials.
Quick Start
(Receiver) (LED indicator) Different ringtones can be assigned to different transmitters i.e. doorbell, motion sensors etc. can all have a different ringtone.
- Sound volume control: press the volume control button on the receiver. This switch toggles between High and Low volume.
- Set Ringtone: a. Press the Forward Button or Back Button to choose your favourite ringtone. b. Please follow the pairing steps below to sync the new ringtone. The new ringtone will be set for the most recently synced transmitter.
Pairing a transmitter to the receiver
- Please select your favourite ringtone before pairing. (Select ringtone)
- Press the volume control button for 5 seconds until a Ding-dong is heard and the LED indicator starts flashing you are now in pairing mode. (Hold volume button for 5s)
- Activate the transmitter to send a signal to the receiver. (Active the transmitter)
Two or more transmitter pairing
The pairing mode is required for each transmitter. For two or more transmitters, please follow the pairing steps (1)-(3) for each transmitter.
Reset
Press the forward button for 5 seconds to reset receivers to default settings. When receiver sounds 'Ding Dong' with the LED flashing that means reset was successful. After a reset receivers revert back to the 1st ringtone and transmitters must be paired again.
Please note
- Pairing mode will last for 5 seconds only before timing out. Ensure you activate the transmitter during this time or the process will have to be started again.
- Pairing mode will quit automatically after pairing is completed.
Receiver & door sensor installation
Prior to installation, please test the doorbell range For AC Receiver (plug in): Just plug receiver into standard outlet in room.
Transmitter (Door Sensor) Installation: Double-sided adhesive tape (Preferred install method)
- After ensuring the right mounting position, please clean the flat area where you intend to install transmitter.
- Tear off one side of the double-sided adhesive tape and stick it to the underside of transmitter, tear off the other side and put transmitter onto wall, then press and hold for 10 seconds.
How to setup the contact sensor
The contact sensor can be installed on doors, windows, and any other objects that can opened and closed. The sensor transmits signals to the receiver when a magnet mounted near the sensor is moved away. Adding a door sensor can provide you with a door entry chime/alert system or window/mailbox alert system. A Blue LED indicator will flash once when it is triggered. (LED indicator) (Transmitter) (Magnet)
The gap between the transmitter and magnet should be less than 1cm
Low battery alert
In low power status, the indicator will flash 2 times after the normal one.
Battery replacement
- Open the transmitting part of door sensor using the cover removal slot.
- Find the battery case and take out battery.
- Replace the battery (3v). Please note that the surface with "+" and "CR 1632" should be facing up. (Cover removal slot) (Battery case) (Battery + CR1632)
Trouble shooting
- The receiver doesn't sound (1) Check the transmitter battery (2) The receiver could be out of range from the transmitter (3) The receiver may not have been paired with the transmitter
- Operating range reduced (1) Metal structures, including uPVC door frames can reduce the range of the product. (2) Avoid mounting the push or chime on or near metal structures. (3) Other equipment can cause radio interference that affects your doorbell. (4) Lots of walls and ceilings between the transmitter and receiver will reduce the range. (5) Weak batteries will reduce range. Replace every 12-18 months.
Warranty Info & Contact Information
This product is warranted for 1 year by Safeguard Supply. Please consult the Safeguard Supply website at safeguardsupply.com/warranty-policy for additional information. To contact us: Safeguard Supply
- info@safeguardsupply.com
- 800-366-7235 For warranty information, visit: https://safeguardsupply.com/warranty-policy For FCC Information, visit: https://safeguardsupply.com/fcc
WARNING
- INGESTION HAZARD: This product contains a button cell or coin battery.
- DEATH or serious injury can occur if swallowed.
- A swallowed button cell or coin battery can cause Internal Chemical Burns in as little as 2 hours.
- KEEP new and used batteries OUT OF REACH OF CHILDREN.
- Seek immediate medical attention if a battery is suspected to be swallowed or inserted inside any part of the body. This product may contain button cells or coin batteries, including CR2016, CR2032, and CR2450, each with a nominal voltage of 3V.
- Remove and immediately recycle or dispose of used batteries according to local regulations and keep away from children. Do NOT dispose of batteries in household trash or incinerate.
- Even used batteries may cause severe injury or death.
- Call a local poison control center for treatment information.
- Non-rechargeable batteries are not to be recharged.
- Do not force discharge, recharge, disassemble, heat above (manufacturer's specified temperature rating) or incinerate. Doing so may result in injury due to venting, leakage or explosion resulting in chemical burns.
- Ensure the batteries are installed correctly according to polarity (+ and -).
- Do not mix old and new batteries, different brands or types of batteries, such as alkaline, carbon-zinc, or rechargeable batteries.
- Remove and immediately recycle or dispose of batteries from equipment not used for an extended period of time according to local regulations.
- Always completely secure the battery compartment. If the battery compartment does not close securely, stop using the product, remove the batteries, and keep them away from children.