
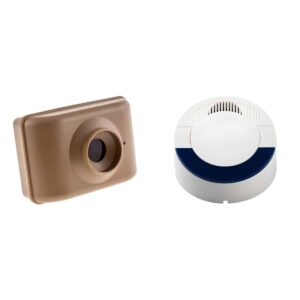
DCMA-4000 User Manual
Setup, pairing, and troubleshooting for the DCMA-4000 Dakota Alert Driveway Monitor.
TM
- Dakota Alert®
- WIRELESS SECURITY EQUIPMENT
- Wireless Motion
- Detector Transmitter
- DCMT-4000
- USER GUIDE
www.dakotaalert.com
--- page break ---
2
--- page break ---
This DCMT-4000 Dakota Alert Motion Detector transmits a signal to your DCR-4000 receiver when it detects a person or vehicle in the monitored area. Connect multiple motion detectors (or other transmitters) to your receiver to create a complete security system.
What's Included
- Motion Detector Transmitter
- Plate mount
- Swivel mount
- Screws (4)
- User Guide SETTING UP YOUR MOTION DETECTOR 1. Adjust the motion detector settings. See “Adjusting motion detector settings” on page 4. 2. Install a 9V alkaline battery (not included). See “Installing the battery” on page 7. 3. Select a tune and connect your motion detector to your receiver. See “Connecting to your receiver” on page 7. 4. Mount your motion detector. See “Mounting your motion detector” on page 8. 3 --- page break --- ADJUSTING MOTION DETECTOR SETTINGS To adjust your settings, move the jumpers inside the motion detector’s case to complete a circuit. 1. Remove the four screws on the back of the motion detector and remove the cover. Back 2. If the battery is connected, remove it from the motion detector. Inside 4 --- page break --- 3. Gently pull off the jumper for the setting you want to change. Note: If you can’t remove the jumper with your fingers, you can use tweezers. Jumper Jumper pin Gently slide the jumper back onto the pair of jumper pins that corresponds with the setting you want. Filter Range LED Reset Each setting has its own jumper group: Changes the distance that the motion detector will sense motion. L L L (low): M (medium): L Hi (high): M M Hi Hi M Hi 5 --- page break ---
- LED: Turns LEDs on or off. OFF OFF ON ON ON: LED lights for 2 seconds when motion is detected. Changes the sensitivity level of the motion detector to filter out small movements like leaves moving outside. OFF OFF: OFF ON for indoor use ON ON: for outdoor use Changes the minimum time between alarm activations. 120S (120 seconds): 120S waits 120 seconds before 10S the alarm activates again 10S (10 seconds): 120S waits 10 seconds before 10S the alarm activates again When you’re finished adjusting the settings, replace the battery and cover, then secure with the screws. 6 --- page break --- INSTALLING THE BATTERY 1. Remove the four screws on the back of the motion detector and remove the cover. 2. Connect a 9V alkaline battery (not included) to the motion detector and place it in the battery slot. 3. Replace the cover and secure with the screws. CONNECTING TO YOUR RECEIVER Note: You can connect up to 16 transmitters to your receiver. 1. Place your receiver and motion detector near each other. Note: Be careful not to activate your motion detector until you find the tune you want. Consider covering the sensor to avoid accidentally activating it. 2. Press and hold the MODE and (volume) buttons for three seconds. When all four lights flash, release the buttons. 3. Press (volume) repeatedly until you find the tune you want to use. 1 Ding Dong (high) 5 Alarm/Siren 9 William Tell 2 Ding Dong (low) 6 Coo Coo Clock 10 Cannon in D 3 Westminster 7 Bird Chirping 11 Morning 4 Fur Elise 8 Twinkle Twinkle 12 Toreador March 4. After you choose a tune, activate the motion detector (wave your hand in front of the motion sensor). The receiver emits a short beep. 7 --- page break --- 5. If you are coding more than one transmitter, repeat steps 3 and 4. 6. After your transmitter(s) are coded, press and hold the MODE button until the LEDs stop flashing. 7. To test the tune, activate the motion detector. You’ll hear the selected tune through your receiver and the lights will flash. MOUNTING YOUR MOTION DETECTOR Note: For the maximum range between the motion detector and receiver, mount the motion detector on a wooden post or tree (steel posts may interfere with the signal). Although the maximum range is about ½ mile, obstructions such as hills, trees, metal siding and stucco can reduce that range. 1. Select a location to mount the motion detector. For the best results: » Mount the motion detector to a wooden post or tree (steel posts may interfere with the signal). » Place 3-4 feet off the ground and about 20 feet from the side of the drive. » The motion detector will detect people or vehicles to about 100 hundred feet, but occasionally it may detect much farther. For this reason, avoid pointing the transmitter at roads in the distance. » Keep the motion detector completely immobile to prevent false signals. Avoid mounting the transmitter on flimsy objects or small-diameter trees that may move in the wind. 2. Select a mounting bracket. » The plate mount is ideal for outdoor applications such as trees and posts. » The swivel mount is for indoor applications such as pointing towards doorways, windows, or any time more adjustment is needed for the transmitter position. 8 --- page break --- 3. Use a drill and the included screws to mount the bracket. Make sure that the arrow on the bracket is facing up. Swivel mount Or Plate mount 4. Slide the transmitter down onto the bracket. The LED on the transmitter should be toward the top of the case to work properly. Or 9 --- page break --- ADJUSTING THE VOLUME
- Press the (volume) button repeatedly to adjust the volume (four levels and off ). The lights show the volume level for four seconds. SPECIFICATIONS
- Power source: 9V alkaline battery
Dimensions
(H × W × D): 4.5 × 3 × 2.25 in. (11.4 x 7.6 x 5.7 cm)
- Motion detection range: Low: up to 25 ft.,
- Operating temperature: -30 to 120°F (-34.4 to 48.9°C) Medium: up to 50 ft., High: up to 100 ft.
- Operating frequencies: 433 MHz
Wireless Range
Up to 1 mi. (1.6 km)* *Actual range will vary depending on local terrain and obstructions.
- TECH SUPPORT If you have problems using this product after reading this manual, please contact us. You can reach us by phone at 605-356-2772 from 8:30 AM to 5:00 PM Monday through Friday (Central Standard Time). We will be happy to answer your questions and help you in any way we can.
Warranty
Dakota Alert warrants this product to be free of defects in materials and workmanship for a period of one year from the date of purchase. This warranty does not cover damage resulting from accident, abuse, act of God, or improper operation. If this product does become defective, simply return it to Dakota Alert.
Please include a note describing the troubles along with your name and return address as well as the original sales receipt. If the product is covered under the warranty it will be repaired or replaced at no charge. If it is not covered by the warranty, you will be notified of any charges before work is done. 10
--- page break ---
LEGAL NOTICES This device complies with Part 15 of the FCC Rules. Operation is subject to the following two conditions: (1) this device may not cause harmful interference, and (2) this device must accept any interference received, including interference that may cause undesired operation. Changes or modifications not expressly approved by the party responsible for compliance could void the user’s authority to operate the equipment.
This equipment has been tested and found to comply with the limits for a Class B digital device, pursuant to Part 15 of the FCC Rules. These limits are designed to provide reasonable protection against harmful interference in a residential installation. This equipment generates, uses, and can radiate radio frequency energy and, if not installed and used in accordance with the instructions, may cause harmful interference to radio communications.
However, there is no guarantee that interference will not occur in a particular installation. If this equipment does cause harmful interference to radio or television reception, which can be determined by turning the equipment off and on, the user is encouraged to try to correct the interference by one or more of the following measures:
- Reorient or relocate the receiving antenna.
- Increase the separation between the equipment and receiver.
- Connect the equipment into an outlet on a circuit different from that to which the receiver is connected.
- Consult the dealer or an experienced radio/TV technician for help. WARNING: Cancer and Reproductive Harm. Go to www.P65Warnings.ca.gov for more information. 11 --- page break --- TM Dakota Alert® WIRELESS SECURITY EQUIPMENT Dakota Alert, Inc. www.dakotaalert.com Phone: (605) 356-2772 Fax: (605) 356-3662 Address: 32556 477th Ave. | P0 Box 130 | Elk Point, SD 57025 18-0640