
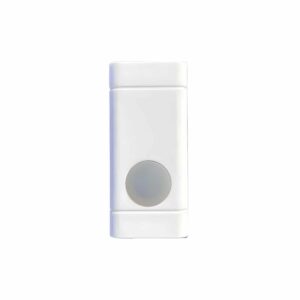
SS111 User Manual
Setup, pairing, and troubleshooting for the Safeguard Supply SS111 Wireless Push Button for SS Series Systems.
Receiver And Transmitter Installation Remarks: (1)Pairing mode will timeout automatically after pairing is completed. Important: Test the range before mounting the push button (or other (2)Pairing mode will last for 5 seconds only. compatible sensor). The sensor will be referred to as a "transmitter" in this document.
The options below are for a pus button. Two or more transmitters pairing: Transmitter (push button) Installation Method 1: Double-sided
- Only one transmitter can be programmed at a time. For additional
- adhesive tape.
- transmitters, please follow the pairing steps (1)-(3) once again to pair
(Easiest install method). the transmitters one by one. 1.After ensuring the right mounting position, please clean the flat area where you intend to install transmitter. It is common practice to choose a different ringtone for each 2.Tear off one side of the double-sided adhesive tape and stick it to the transmitter so you can distinguish which transmitter is being triggered. underside of transmitter; tear off the other side and place the transmitter on the wall.
Hold in place for 10 seconds. Factory Reset: Hold the Music Change button for approximately 5 seconds. You will Transmitter Installation Method 2: Screw/Anchors hear a short ‘Ding Dong’ ringtone and a quick flash of the LED strobe Please prepare an electric drill, Phillips screwdriver and slotted light.
This indicates the receiver has reset to factory settings which is screwdriver before installation. no transmitter paired and the receiver set to the "Ding-Dong" sound. 1.Use the small screwdriver to separate the top half of the case from the lower half of the cases. Changing the Ringtone: 2.Using the back half of the case as a template, make two marks on the Refer to Step 3 in the "Quick Start" section of this manual. wall where the pre-drilled holes are located.
- 3.Drill two holes on the marked places, then insert the wall anchors (if
- needed).
- 4.Use the supplied screws to secure the back half of the push button to
the wall. 5.Snap top half of push button cover to lower half. 4 Transmitter Battery
Warranty
- Info & Contact Information
- This device complies with part 15 of the FCC Rules. Operation is subject to
- The transmitter in this kit is the SS111 push button. It is powered
- the following two conditions: (1) this device may not cause harmful
- by a 23A 12V Alkaline battery (included). The battery comes
- interference, and (2) this device must accept any interference received,
- installed in the transmitter, and to activate, simply pull out the tab. To
- including interference that may cause undesired operation.
- change the battery for future use, use a small flat head screw driver to
- press down on the indented tab on top and your other hand to pry
open the top half from the lower half of the case. Note: This equipment has been tested and found to comply with the limits for a Class B digital device, pursuant to part 15 of the FCC Rules. These limits are Please note.
Keep the transmitter and battery out of the reach of designed to provide reasonable protection against harmful interference in a children. residential installation.
- This equipment generates, uses, and can radiate radio frequency energy and,
- if not installed and used in accordance with the instructions, may cause
- harmful interference to radio communications. However, there is no guarantee
- that interference will not occur in a particular installation.
- If this equipment does cause harmful interference to radio or television
- reception, which can be determined by turning the equipment off and on, the
- user is encouraged to try to correct the interference by one or more of the
- following measures:
- Reorient or relocate the receiving antenna.Increase the separation between
- the equipment and receiver.
- Connect the equipment to an outlet on a circuit different from that to which the
- receiver is connected.Consult the dealer or an experienced radio/TV
technician for help. 6 7
- What You Should Know Before Using
- 1.The transmitter (push button) supplied with this kit comes paired with
- the receiver from the factory, set to default ringtone “Ding-Dong”. If you
- are only using the push button included with this kit and are okay with
- the "Ding-Dong" ringtone, then there is no programming/pairing
- required.
- 2.IF NOT, please refer to the “Quick Start” section to
Pairing the Transmitter
with the receiver and set your favorite ringtone(s).
- 3.It is not advisable to mount the transmitter onto metal surfaces as it
- will diminish or block RF signals between the transmitter and the
- SS110 receiver. However, if this is the only option then we recommend that you
- use the double sided tape provided for mounting the push button.
- WIRELESS DOORBELL
- 4.Operating range will decrease if battery in transmitter is in low power
- status.
- User Manual
- 5.It is not advisable to mount the transmitter in the outdoor directly
- without any shelter which could accelerate aging of plastic materials.
- This product is warranted for 1 year by Safeguard Supply. Please
- consult the Safeguard Supply website at safeguardsupply.com/
Warranty
policy for additional information.
- Safeguard Supply: info@safeguardsupply.com/ 904-245-1184
- Please carefully read this user manual before using and installation
- 3.Pairing a transmitter to the receiver:
- Quick Start
- (1)Select the ringtone you want to
- associate with the transmitter.
- Select ringtone
- (2)Hold and press the
Volume Control
button for 5s until a “Ding-Dong” sound is heard and the LED strobe starts flashing. The receiver is now in paring mode.
- 1. Volume Control Button Location: Press the Volume Control
- button on the receiver. Press the button to toggle between High Hold volume button for 5s
- and Low volume and mute. *The volume level setting does not
- affect the strobe light.
- 2. Ringtone Using the Music Change Button: Press the Music
- Change button to choose your favorite ringtone. Stop pressing
the button once you hear the ringtone you want to use. (3) Push the center push on the push button (or other transmitter) to send a signal to the receiver.
3