
Product manual
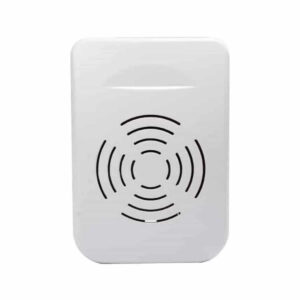
SS-PSIREN-W User Manual
Setup, pairing, and troubleshooting for the SS-PSIREN-W Loud 12V DC Piezo Siren with Volume Control.
Connecting SS-PSIREN-W to ERA-DCRX Receiver Owner’s Manual This device complies with Part 15 of the FCC rules, Operation of this device is subject to the following conditions: 1. This device may not cause harmful interference. 2. This device must accept any interference, including interference that may cause unde-sired operation.
Introduction
When a transmitter is activated, it will send a signal to the receiver which will sound one of 12 different tones. If activated, it will also trigger the corresponding 12V DC output for the zone for the configured duration. Helpful Notes:
Pairing the Transmitter
per the instructions for that transmitter.
- Each zone features 1 x 12V DC output that is activated when that zone is triggered.
- Output duration for the 12V DC output may be set to 5 sec, 10 sec, 1 min, & 2 min. The receiver features 1 x C-Form relay assignable to one or multiple zones & will take on the duration of the 12V DC output (figure 2).
- The C-Form Relay may be associated with a specific zone or multiple zones.
- 12V DC output current: 400mA maximum.
- The form “C” relay is rated for 24 VDC at 3 Amp maximum current.
- Form "C" relays DOES NOT supply power to external device.
- The SS-PSIREN-W will play two different sounds. Wire to #1 or #2 for different sounds (figure 3).
- The siren has a volume control knob (figure 3). Connecting a the SS-PSIREN-W to a 12V DC Output: 1. Unplug the receiver. 2. Separate top receiver case from bottom receiver case on both the ERA-DCRX receiver & SS-PSIREN-W siren. 3. Locate terminal block (figure 1) located on the bottom of the pc board of receiver, and terminal block (figure 3) on pc board of siren. 4. Loosen screws for the zone(s) that you are connecting the siren to. 5. Located the external 12V DC terminal connection block that corresponds to the respective zone on the ERA receiver (figure 1). For example, if a push button is paired to zone 1, and you want the siren to sound for zone 1, wire the siren into the terminal block for zone 1. 6. Wire from the negative (-) terminal screw on the receiver (figure 1) to the "GDN" screw on the siren (figure 3). 7. Wire from the positive (+) terminal screw on the receiver to the #1 or #2 screw on the siren. #1 is a continuous siren sound (for set time duration), while #2 is an alternating siren sound (for set time duration). 8. Re-tighten screws on terminal block. 9. Adjust output duration as needed (figure 2) on the receiver (this is how long the siren will sound). 10. Adjust volume on siren (figure 3). 11. Plugin Receiver. Ensure battery is installed in transmitter. 12. Trigger transmitter to test siren. 13. Snap cover back together. (Figure 1) volume (Figure 2) control knob (Figure 3) TECHNICAL SUPPORT If you encounter any difficulty in the operation of this product after reading the manual, please contact us. You can reach us by phone at 904-245-1184 from 8:00 AM to 5:00 PM Monday through Friday (Eastern Standard Time). We will be happy to answer your questions and help you in any way we can.
Warranty
- Safeguard Supply warrants this product to be free of defects in material
- and workmanship for a period of one year from the date of purchase.
- This warranty does not cover damage resulting from accident, abuse, act
- of God or improper operation. If this product does become defective,
- simply return it to Safeguard Supply. Please include a note describing the
- troubles along with your name and return address as well as the original
- sales receipt. If the product is covered under warranty it will be repaired
- or replaced at no charge. If it is not covered by warranty, you will be
- notified of any charges before work is done.
- Safeguard Supply
- 2260 Moon Station Ct. NW #110
- Kennesaw, GA 30144
- Phone: (678) 214-4212
www.safeguardsupply.com