
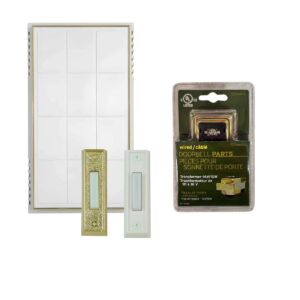
CK225 User Manual
Setup, pairing, and troubleshooting for the Complete Wired Doorbell Kit with Two Lighted Buttons and Transformer.
Carlon® WIRED CHIME KIT CK225
- LIMITED WARRANTY
- The product you have purchased is guaranteed against
- defects in workmanship and materials for the period
- stated on the package. If the product fails due to a manufacturing
- defect during normal use, return the product
- to the store where purchased for replacement OR
- send product to:
- Lanson & Sessions
- Attn: LHP Customer Service
- 25701 Science Park Drive
- Cleveland, OH 44122 USA
Not Covered - Batteries, light bulbs, and other expendable items, repair service, adjustment and calibration due to misuse, abuse or negligence are not covered by this warranty. Unauthorized service or modification of the product or of any furnished components will void this warranty in its entirety. This warranty does not include reimbursement for inconvenience, installation, set-up time, loss of use, postage, unauthorized service, or other products used in conjunction with, but are not supplied by, Lanson & Sessions. All requests for replacement must include a dated sales receipt (copies accepted) and this guarantee statement. LAMSON & SESSIONS SHALL NOT BE LIABLE FOR LOST PROFITS, INDIRECT, SPECIAL, EXEMPLARY, INCIDENTAL OR CONSEQUENTIAL DAMAGES INCLUDING WITHOUT LIMITATION ANY SUCH DAMAGES DUE TO IMPROPER WIRING OR MISUSE OF THE PRODUCT.
CK225 1 YEAR WARRANTY
CONTENTS
(1) Chime (2) Lighted Buttons (1) 16V Transformer Note: Most chime failures are attributable to one or more of the system components, including the doorbell button. Failure to install all components in the kit may result in damage to the new chime.
NEW INSTALLATION
- Always turn off house power before beginning installation.
- Choose a location for your chime receiver which allows it to be seen as well as heard.
- Mount the transformer to a junction or circuit breaker box. Attic location is not recommended.
- Using wire nuts, connect transformer leads to house power leads.
- Extend standard bell wire from transformer and pushbutton(s) terminally to chime. See wiring diagram below for assistance. Be sure to label all wires (front, rear, transformer).
- Insert wires through holes in base and mount base, using provided screws.
- Connect labeled wires to correct terminal screws. See wiring diagram below for assistance.
- Position chime cover securely over base.
REPLACEMENT INSTALLATION
- Simple chime replacement does not involve the transformer and it is not necessary to disconnect power source. If old transformer does need replacement, turn off house power before beginning installation.
- Remove the chime cover from the base. Disconnect the wires from terminal screws, marking them front, rear, transformer as they are removed.
- Remove existing chime base from the wall. Insert wires through holes in new chime base and mount base, using provided screws.
- Connect labeled wires to correct terminal screws. See wiring diagram below for assistance.
- Position chime cover securely over base.
Carlon® 25701 Science Park Drive Cleveland, Ohio 44122 www.lanson-sessions.com Made in China ©2003 LAMSON & SESSIONS 0305 SCK225